
1. build.gradle에 의존성 추가하기
Spring과 AWS를 연동시키기 위해 spring-cloud-starter-aws을 사용한다.
dependencies {
	// aws s3
	implementation group: 'org.springframework.cloud', name: 'spring-cloud-starter-aws', version: '2.2.6.RELEASE'

}
2. application.yml에 버킷 및 자격 정보 입력하기
cloud:
  aws:
    credentials:
      instance-profile: false
      access-key: {IAM MY_ACCESS_KEY 입력}
      secret-key: {IAM MY_SECERT_KEY 입력}
    region:
      static: ap-northeast-2
    stack:
      auto: false

logging:
  level:
    com:
      amazonaws:
        util:
          EC2MetadataUtils: error

aws:
  s3:
    bucket: {버킷 이름}
아래의 에러가 발생하면 cloud.aws.stack.auto=false를 넣어주면 된다.
Exception encountered during context initialization - cancelling refresh attempt: org.springframework.beans.factory.BeanCreationException: Error creating bean with name 'org.springframework.cloud.aws.core.env.ResourceIdResolver.BEAN_NAME': Invocation of in
...
3. Amazon 계정과 연결하기
Amazon IAM계정과 연결하기 위한 Config클래스를 생성한다. (참고)
.withRegion() 지역 설정을 필수로 하고 AWSCredentialsProvider 인터페이스를 입력으로 사용하는 클라이언트 빌더에 자격 증명 공급자나 공급자 체인의 인스턴스(accessKey, secretKey)를 제공한다.
@Configuration
public class S3Config {
    @Value("${cloud.aws.credentials.access-key}")
    private String accessKey;

    @Value("${cloud.aws.credentials.secret-key}")
    private String secretKey;

    @Value("${cloud.aws.region.static}")
    private String region;

    @Bean
    @Primary
    public BasicAWSCredentials awsCredentialsProvider(){
        BasicAWSCredentials basicAWSCredentials = new BasicAWSCredentials(accessKey, secretKey);
        return basicAWSCredentials;
    }

    @Bean
    public AmazonS3 amazonS3() {
        AmazonS3 s3Builder = AmazonS3ClientBuilder.standard()
                .withRegion(region)
                .withCredentials(new AWSStaticCredentialsProvider(awsCredentialsProvider()))
                .build();
        return s3Builder;
    }
}
4. S3 버킷에 있는 파일 다운로드하기
이제 다운로드를 하기 위해 @Service 클래스를 생성한다. (참고)
1. AmazonS3 클라이언트의 getObject 메서드를 사용하여 다운로드할 버킷 및 객체의 이름(bucket, storedFileName)을 전달하고 매칭이 되면 S3Object를 반환한다.
S3Object o = amazonS3.getObject(new GetObjectRequest(bucket, storedFileName));
2. 그리고 S3Object의 getObjectContent()를 호출하여 객체의 내용을 S3ObjectInputStream 형태로 가져오고 IOUtils의 toByteArray() 메소드에 의해 파일을 만들고 내용을 쓰는 과정을 거친다.
* S3ObjectInputStream은 Java로 동작하는InputStream객체이다.
* toByteArray()안에서 ByteArrayOutputStream output을 통해 write를 하고 결과물을 byteArray로 리턴한다.
S3ObjectInputStream objectInputStream = o.getObjectContent();
byte[] bytes = IOUtils.toByteArray(objectInputStream);
3. 전송하는 파일의 종류에 따라 Content-Type을 지정해준다. 이미지는 "image/jpeg" 같은 형식으로,
기타 파일은 "application/octet-stream"를 넣어준다. 나는 CSV파일을 받을 것이므로 octet-stream으로 입력했다.
HttpHeaders httpHeaders = new HttpHeaders();
httpHeaders.setContentType(MediaType.APPLICATION_OCTET_STREAM);
httpHeaders.setContentDispositionFormData("attachment", fileName);
@Service
@RequiredArgsConstructor
public class DownloadS3 {

    private final AmazonS3 amazonS3;

    @Value("${aws.s3.bucket}")
    private String bucket;

    public ResponseEntity<byte[]> getObject(String storedFileName) throws IOException{
        S3Object o = amazonS3.getObject(new GetObjectRequest(bucket, storedFileName));
        S3ObjectInputStream objectInputStream = o.getObjectContent();
        byte[] bytes = IOUtils.toByteArray(objectInputStream);

        String fileName = URLEncoder.encode(storedFileName, "UTF-8").replaceAll("\\+", "%20");
        HttpHeaders httpHeaders = new HttpHeaders();
        httpHeaders.setContentType(MediaType.APPLICATION_OCTET_STREAM);
        httpHeaders.setContentLength(bytes.length);
        httpHeaders.setContentDispositionFormData("attachment", fileName);

        return new ResponseEntity<>(bytes, httpHeaders, HttpStatus.OK);

    }
}
컨트롤러에 해당 서비스 로직과 경로를 매핑시켜준다. 만약 S3 버킷안에 파일이 없거나 파일명이 일치하지 않는다면 다운이 되지 않고 NullException에러가 발생할 것이다.
@Controller
@RequiredArgsConstructor
public class S3Controller {

    private final DownloadS3 downloadS3;

    @GetMapping("/csv_download")
    public ResponseEntity<byte[]> download() throws IOException {
        return downloadS3.getObject("20210520.csv");
    }
}
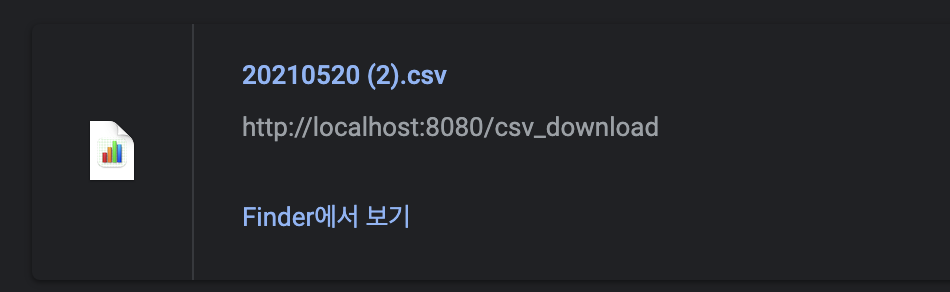
다운로드 성공!
❈ 참고한 사이트
https://docs.aws.amazon.com/ko_kr/sdk-for-java/v1/developer-guide/credentials.html
https://docs.aws.amazon.com/AWSJavaSDK/latest/javadoc/com/amazonaws/util/IOUtils.html
'Dot Programming > Spring' 카테고리의 다른 글
| [Spring] 스프링으로 OAuth2 로그인 구현하기2 - 네이버 (0) | 2021.06.25 |
|---|---|
| [Spring] 스프링으로 OAuth2 로그인 구현하기1 - 구글 (0) | 2021.06.25 |
| [Spring] 스프링 프로젝트 계층 구조 설계하기 (레이어 아키텍처) (0) | 2021.06.24 |
| [Spring] Spring Data JPA란 무엇인가? (0) | 2021.06.24 |
| [Spring/ AWS] S3에 있는 파일(CSV) 다운로드없이 바로 읽기 (0) | 2021.05.22 |


